pieces of cardboard
plastic bag
packing tape
scissors
lens
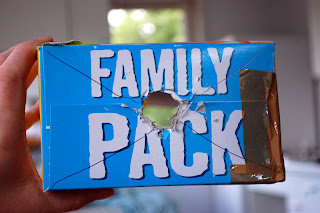 |
Step 1: I found an empty cereal box, cut it to a good rectangular size, and drew an X on the end. In the center where the lines met, I carved a whole out to place the lens that Sylvia provided. The carving took a bit of time since I mistakenly started to carve after I had taped the cardboard into a rectangle.
|
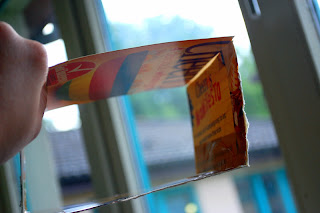 |
| Step 2: I pieced together pieces of a cereal box to form the smaller chamber that will fit inside of the large box. I used tape to do this- it required the assistance of a flatmates helping hands. I struggled a bit in the taping together process! |
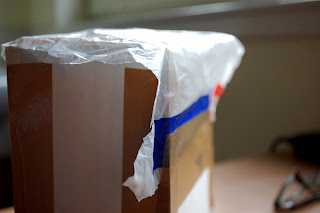 |
Step 3: I taped part of a plastic bag around the edges of the smaller chamber to use as the semi-translucent plastic sleeve. The only difficult part of this step was trying to make sure the plastic was smooth and flat so it would produce a good image. I felt the plastic was secure and flat, then I moved onto the last step.
|
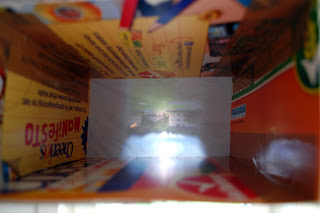 |
| Step 4: I placed the smaller box inside of the larger box to test out the camera obscura. It seemed to be a success! The chamber box fit perfectly into the larger box. The camera obscura seemed to be quite functional. I have high hopes that I will be able to reflect some high quality images when I start the second portion of this assignment! |
No comments:
Post a Comment